|
Learn To Crochet In Rows
So - now you need to learn to crochet in rows. You've already learned about slip knots, chain (ch) and single crochet (sc). You may also have learned half double crochet (hdc), double (dc) and treble crochet (tr), and slip stitch (sl st).
Now it's time to build on that knowledge and learn to produce pieces of fabric from the stitches you know. These fabric pieces can then
be joined together (by crochet or otherwise) to make many, many projects.
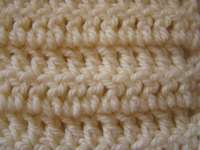
Firstly - there is a 'right' (front) and a 'wrong' (back) side to crochet work. When you crochet in rows you will see a slight difference between the front and back of the stitches in alternate rows. The front of a stitch looks and feels smoother than the slightly more bumpy back of the stitch. It is a more subtle difference than the knit/purl effect in knitting, but there is a difference. Working in rounds produces a smooth right side with no bumps or ridges (depending on the stitch used), and a more textured back.
I actually find it easier to count rows in groups of two when I crochet in rows, as the 'pairs' naturally form a slight bump then a slight dent.
So - when you crochet in rows you will be turning your work over and working into the back of the previous row of stitches. This actually makes the holes where you place your hook easier to see than when you work in rounds.
The holes where you place your hook to form the next stitch are always to the left of the stitch worked in the previous row. This gem of information is really useful when you need to skip stitches.
Each new stitch forms a 'v' shape along the top of the row. If you look directly at the top edge of your work, you'll see a line of 'v's.
You should always work under the whole 'v' shape (two strands) when you form new stitches, unless the pattern says otherwise.
Traditionally each stitch has a certain number of turning chains which raise the row to the correct level for the stitches in that row. These are the recommended numbers of turning chains for each stitch...
These are the numbers generally used in patterns, but they are not set in stone. I actually prefer to use just 2 turning chains for double crochet stitches. I find it gives me a neater edge. Really -it's personal preference and design that will help you determine which is the best number of turning chains for the stitches in your project.
The turning chain at the beginning of each row will most often count as the first stitch of the row. This means that the next stitch should be worked into the second stitch. This is correct in all stitches except single crochet where the first single crochet should be worked into the first stitch of the row to keep your numbers correct.
When you crochet in rows it's a good idea to work the turning chain before you flip your work over. This is for no special reason other than it is easier to work the chains this way. There's no need to remove your hook from your work either.
Actually - when I have to stop mid-project (which is often), I just pull the last loop through quite long (about 6 inches), take out my hook, then roll up my work and hide it all from my little ones. This means
that even if I accidentally catch the yarn and pull it I'm unlikely to lose any of my work.
So - that's about it for learning to crochet in rows. You could try a sampler scarf to practice all the stitches you know and get you used to working crochet in rows.
Just work one or two rows of each stitch, then switch stitches. This technique would work best in long rows along the length of the scarf. Give it a try! It might be better and more useful at first than just doing sample squares!
|


